It’s Time for Some Spring Cleaning!
What’s your preferred method of smoking? Most of our customers agree that when it comes to a bong toke, nothing else compares.
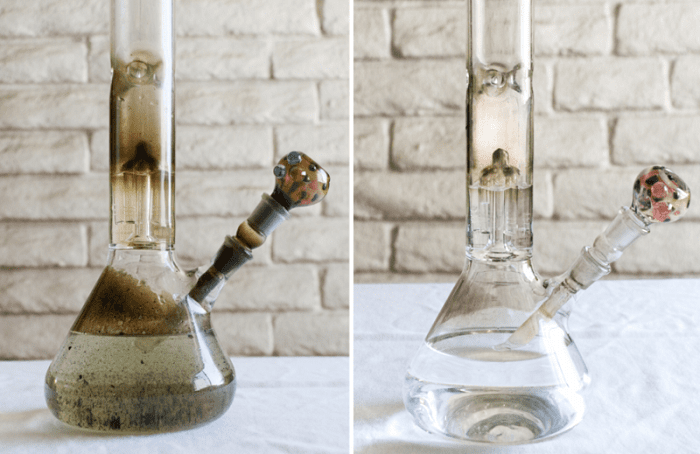
Sure, you walk into the store or check us out online and the bongs are so clean, shiny and beautifully brand spankin’ new. BUT, what you don’t see is the ugly sticky icky aftermath of many lip pullin’, lung fillin’ bong rips. Not to mention those of us who have friends and siblings who use our pieces while we’re not around… you know who you are brother, and I’m shaking my fist at you as you read this!
NOT TO WORRY! This blog will assist you with tips and tricks to get your baby back to its original glory!
- First things first, get some gloves on! Dump that danky brown bong water in the toilet and flush before it stinks up the rest of your bathroom!
- Pull the bowl and downstem out and place into a Ziploc bag or Tupperware container.
- CHOOSE YOUR CLEANER!
- Orange Chronic is our bestseller and staff favorite. In store the 16oz bottles are $12.99. This is the ultimate instant cleaner for any glass!
- Purple Power 710 is the only cleaner specifically created for your dabbin’ products. It quickly cleans any dabbers, carp caps and nails made of quarts, ceramic or titanium, not to mention a rig of any size or style.
- Grunge Off is what you want if you’re worried about your high end labels washing away or if you’re an all-natural kind of stoner! This has no alcohol or chemicals.
- Now that you know which cleaner is right for you, fill the Ziploc or Tupperware until the bowl and stems are fully submerged. Let soak.
- Fill your bong with same cleaning until it hits the residue line. If your bong has percolators, also make sure the cleaner covers all those nooks and crannies.
- Even if a cleaner tells you its instant, all cleaners work better if you let it sit and eat away at the residue before you move on to the shaking and baking stages. So roll yourself up a little spliff and give it some time.
- Shake your heart out! Now that your bong has been soaking for 10-20 minutes. (Depending on the size of that joint.). It’s ready for shaking. Remember to cover the mouthpiece and downstem joint with your gloved hands. You’re going to shake, jerk and sway that bong until you no longer see black bits attached to the glass.
- If shaking didn’t fully do the job, you might want to invest in a bong cleaning brush. We have a wide selection of sizes available in store. Or maybe you waited too long to clean your bong and it just needs to have another good soak session.
- Removing the cleaner. If the cleaner is still close to the colour it began as, you can strain the residue out and pour it back into the bottle for another cleaning day. If it came out brown or black; dump that straight down the drain!
- Scrub a dub dub; let’s rinse it in the tub! Rinse the bong fully and thoroughly until there are no visible bubbles and grit or make sure you can’t smell the cleaner on the glass anymore.
- Finish cleaning bowl and downstem in the same way you would the bong. Shaking, brushing and rinsing.
- Once all components are rinsed and wiped down, place the downstem and bowl into that freshly cleaned bong joint.
- Fill the base and percolators with fresh cold water and add ice if that’s your preference.
- Finally; Pack, light, inhale, exhale, relax and admire your hard work.
 SEARCH